Bubble Check: How to Spot Gear Leaks Before a Dive
 Every dive should include a bubble check as part of your pre-dive routine. A bubble check is your last chance to spot gear failures before a dive. Even a small leak can indicate a failed O-ring, loose connection, or hose damage. Catching a leak before descent can prevent gas loss, freeflows, or regulator failures underwater.
When to Perform a Bubble Check
- Shore Dive: Best done before descent while standing in chest-deep water.
- Boat Dive: Perform it immediately after water entry.
- Mid-Water Check: If unsure, ask your buddy to check you during descent.
How to Ask for a Bubble Check (Hand Signals)
- Point at yourself ("Me").
- Point at your eyes ("Look").
- Pinch your fingers together ("Bubbles").
- Point behind you ("Check my back").
How to Perform a Bubble Check (Step-by-Step)
Both divers submerge slightly (kneeling in shallow water or hovering mid-water). The diver being checked slowly spins while their buddy examines these key failure points:
- Chest: BCD inflator hose, drysuit inflation valve.
- Left Side: SPG connection and hose.
- Back: First stage, hoses, and tank valve (especially O-rings on yoke valves).
- Right Side: Primary regulator, alternate air source (octo or backup reg).
- Signal OK or point at leaks using the "pinching" motion to indicate bubbles.
What If You See Bubbles? When to Call the Dive
- Check your tank O-ring before diving. A minor leak at the tank valve often means an O-ring is starting to fail.
- Air trapped in BCD/Wing fabric (harmless).
- A few bubbles escaping from a not fully tightened hose connection.
- Hose leaks often worsen over time. Even a small leak today could lead to a total failure on a future dive.
- Bubbles from regulator hoses (could mean pinholes or a failing crimp).
- Steady leaks from the first stage or tank valve (failed O-ring or loose connection).
- Any air escaping at a rate that changes SPG pressure.
"I personally call a dive for any bubbles on my gear. However, some divers accept minor leaks, such as bad tank O-rings. This is a personal risk decision."
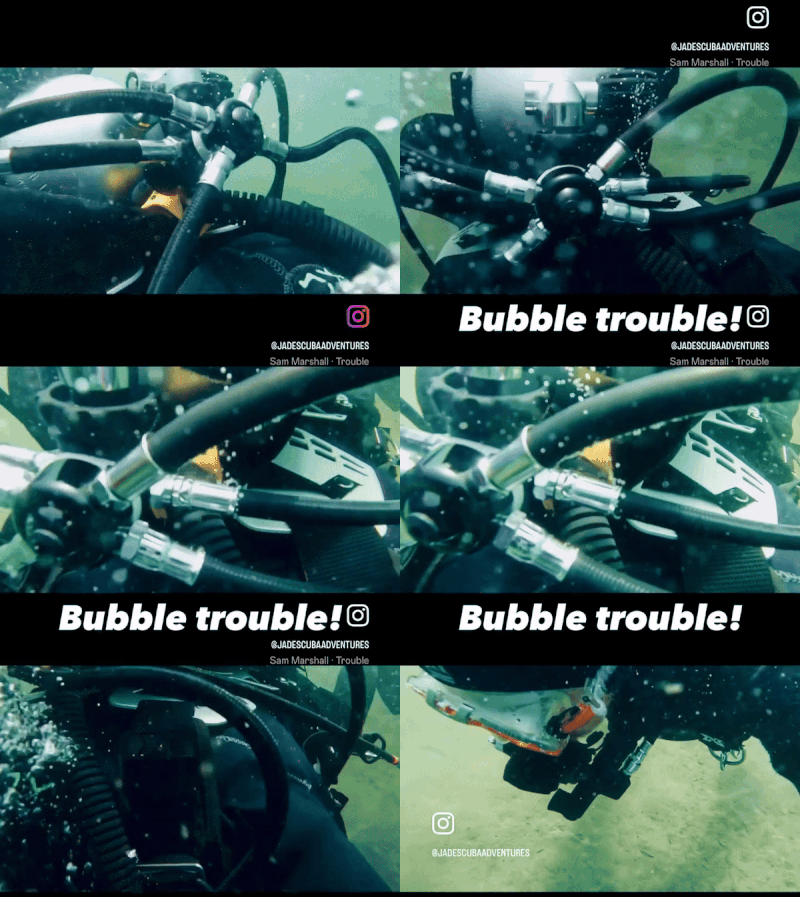
Example of a Bubble Check
Below is a perfect example of what bubbles look like under water. Well done to @jadescubaadventures over on Instagram.

Final Thoughts: Bubble Checks Prevent Equipment Failures
Make bubble checks part of your routine to catch problems before they become emergencies. If you find a leak, fix it before diving or abort the dive.
Want to refine your gear setup? Check out our guide to setting up a Balanced Rig.
Learn to Set Up a Balanced Rig
Understand how to distribute your weight for maximum efficiency.
Learn More